Need help in using our WordPress plugin?
To create a new Donation, follow these steps:
Step 1 - To start creating an Donation, on your Dashboard navigate to Donations > Add Donation. The Add New Donation page will show.
Step 2 - This are the needed information for the Donation, you can add the details.
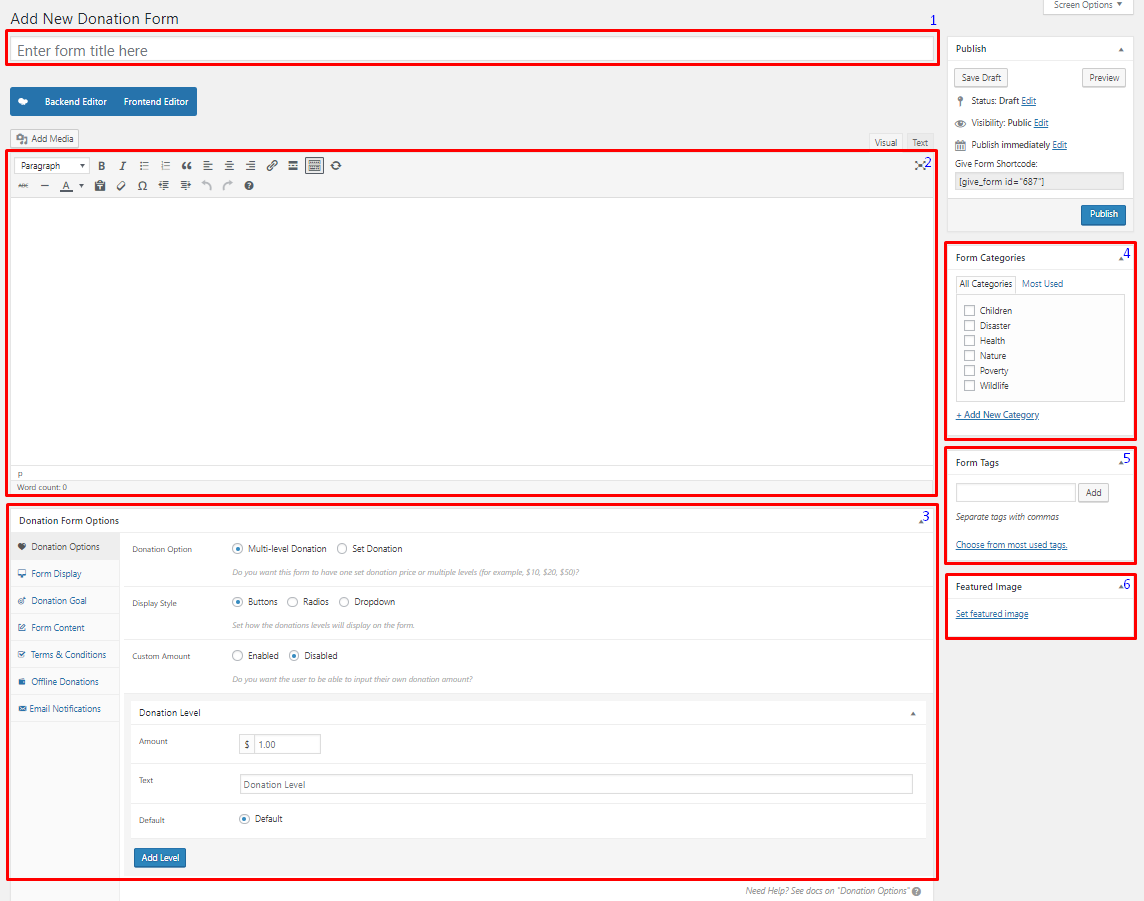
Title - The name of the Donation item.
Editor container - You can add text detail/information about the Donation.
Donation Form Options - Set the details and format of the Donation.
Donation Options
Donation Option - Set the price and level of the possible amount donations. Choose from: Multi-level or Set Donation
Multi-level Donation - Create a multi optioned donation for the form.
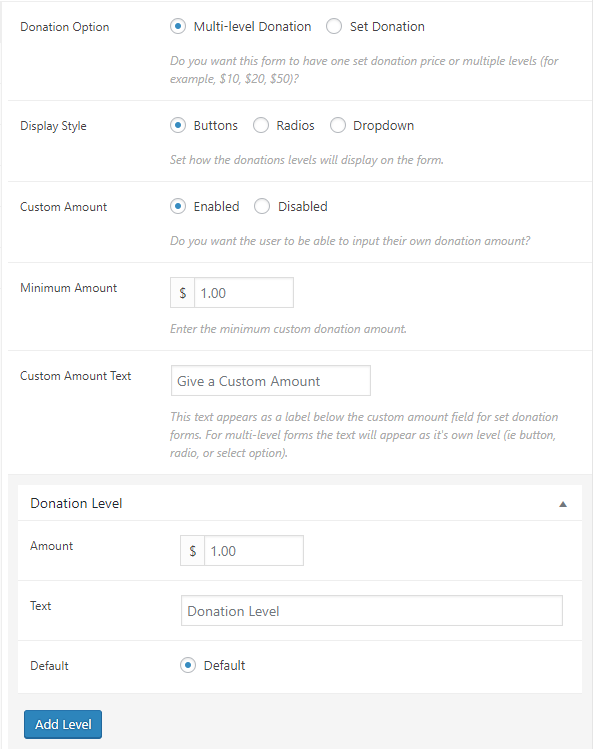
Display Style - How the level of the donation is displayed.
Custom Amount - Option to allow users to input their own donation amount.
- Minimum Amount - Set the minimum amount that the user can donate.
- Custom Amount Text - Text to describe the minimum amount.
Donation Level
- Amount - Donation amount for this level.
- Text - Name of the donation level.
- Default - Option to set the donation level as the default level.

Set Donation - Set a single donation for the form.
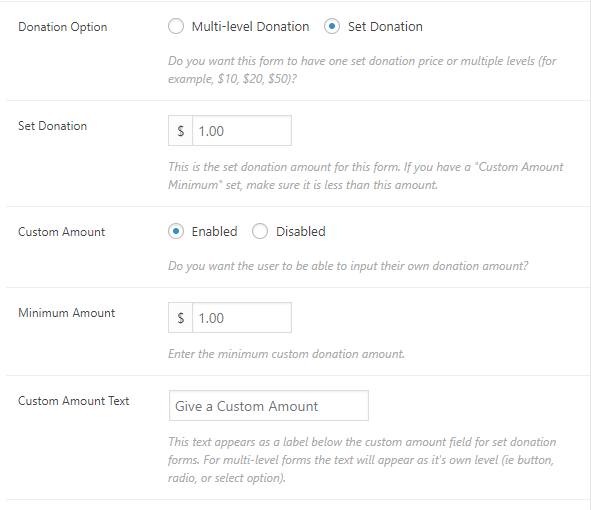
Set Donation - Donation amount set for the form.
Custom Amount - Option to allow users to input their own donation amount.
- Minimum Amount - Set the minimum amount that the user can donate.
- Custom Amount Text - Text to describe the minimum amount.
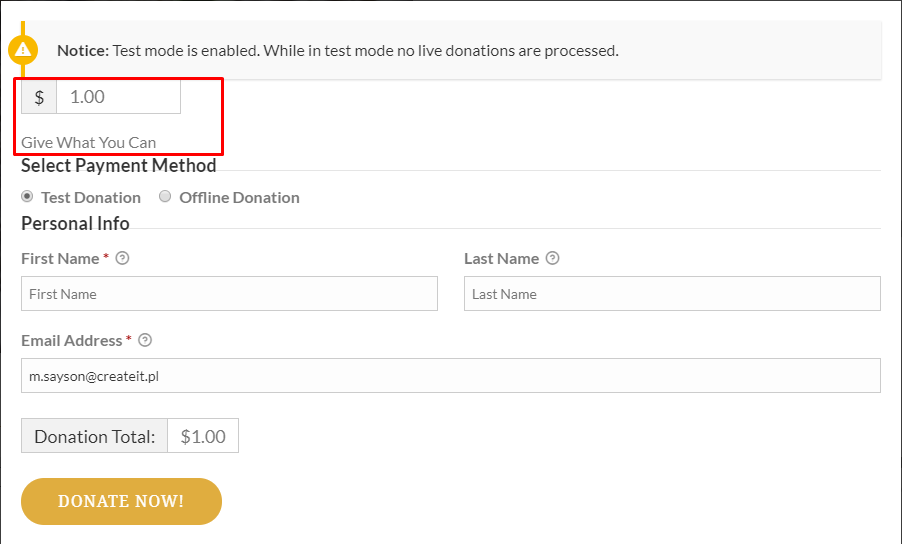
Form Display
- Donation Option - How the donation information of the form is displayed.
- Submit Button - The text/label inside the button.
- Default Gateway - What payment gateway is used for the form.
- Guest Donations - Option to allow guest users to donate.
- Registration - Option to display the Registration and/or Login link if user is a non-logged-in user.
- Floating Labels - Option to allow floating labels.
Donation Goal
- Donation Goal - Option to enable donation goal.
- Goal Format - The display format of donation goal.
- Goal Amount - The amount you want to reach for this form.
- Progress Bar Color - The color for the goal progress bar.
- Close Form - Option to automatically close the donation form once donation goal is reached.
Form Content
- Display Content - Option to add details about the donation form.
- Content Placement - Location where the donation details are shown.
- Content - Content for the donation details.
Terms & Conditions
- Terms and Conditions - Option to require the user to accept terms before donating. Choose options: Global Option, Customize, or Disable
- Agreement Label - This will show when Customize option is enabled. Label for the terms.
- Agreement Text - This will show when Customize option is enabled. Content for the terms.
Offline Donations
- Offline Donations - Option to enable offline donation for the form.
- Billing Fields - This will show when Customize option is enabled. Enable the billing details section for this form’s offline donation payment gateway.
- Donation Instructions - This will show when Customize option is enabled. Content for the instructions.
Email Notification
- New Donation - Options for Email details for new donations. You can edit the email by clicking Custommize.
- Donation Receipt - Options for Email details for donation receipt. You can edit the email by clicking Custommize.
- New Offline Donation - Options for Email details for new offline donations. You can edit the email by clicking Custommize.
- Offline Donation Instruction - Options for Email details for offline donation instruction. You can edit the email by clicking Custommize.
Excerpt - Short summary of the information about the Donation.
Form Category - A broad detail that can categorize this Donation with other Donations.
Form Tags - Specific details that can be use to group this Donation with other Donations.
Featured Image - The Image shown in the listings/pages.
Step 3 - Add all the needed details and descriptions for the Donation, Once satisfied click on Publish button.
To add Events to a page, an element in the Visual Composer is used: Donations Forms
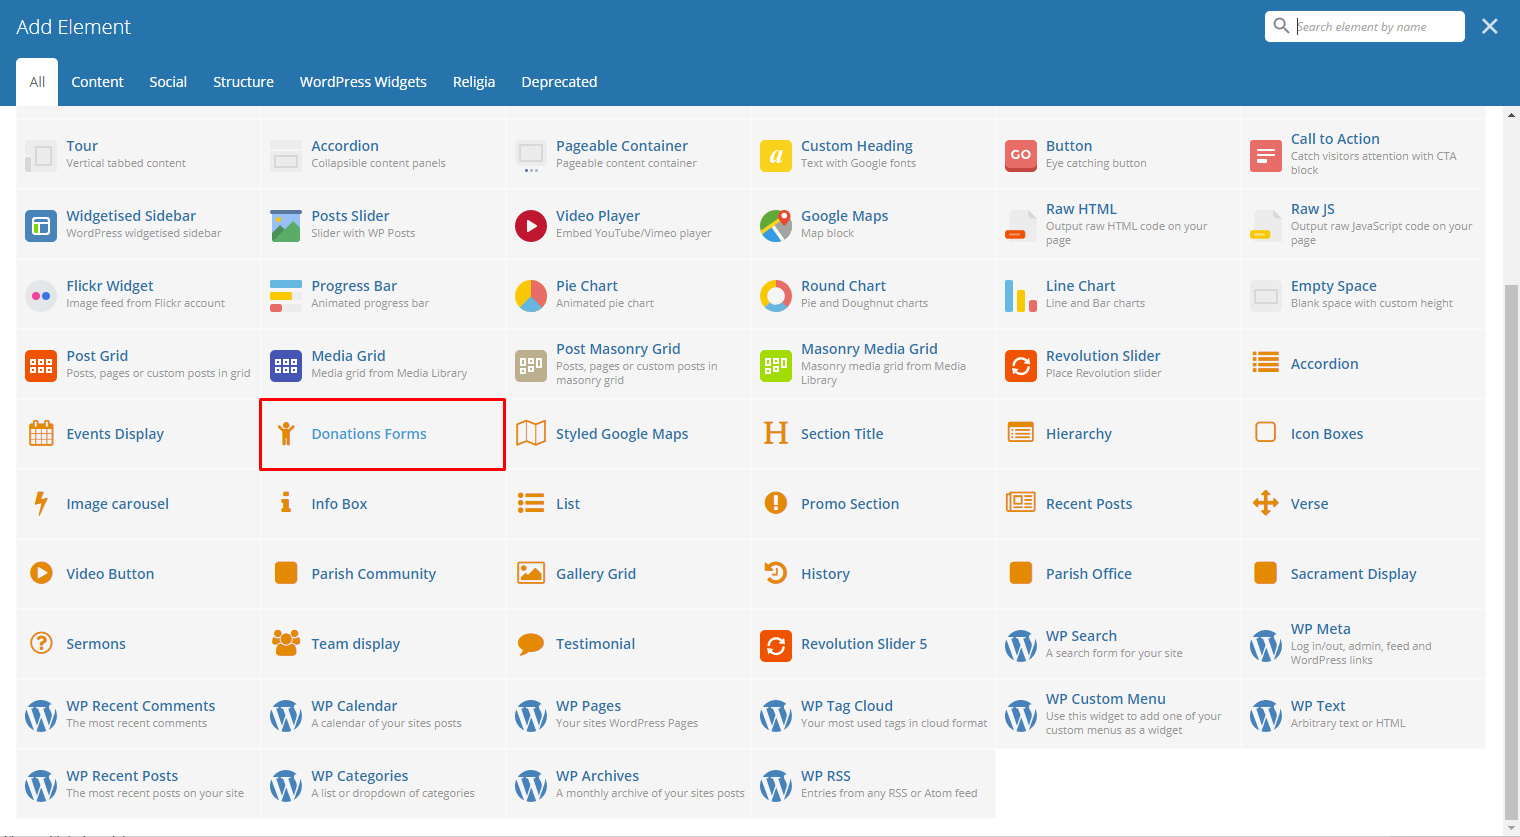
|
This is the element that will add a Donations on the page. For more information about these elements, go to Religia Custom Shortcodes > Donations Forms .
