Need help in using our WordPress plugin?
Menus are a list of commands or options you can customize for you to use in your site.
To make a simple menu, follow the steps:
Step 1 - Navigate your Dashboard to Appearance > Menus. The Menus page will show.
Step 2 - In the menus page, you can edit a menu or make a new menu. To make a new menu, locate create a new menu.
Step 3 - You will be asked to name your menu. After naming the menu, click Create Menu.
Step 4 - From the right side choose pages, links, or categories that you want to add to your menu and click on Add to Menu. Once menu items are added, you can reorder or nest them via drag and drop tool. Remember to click Save Menu when you finish to keep your changes saved.
Step 5 - You can set a menu as a Top primary menu, Menu for side navigation, Post-footer Menu, or Topbar Page Template Menu.
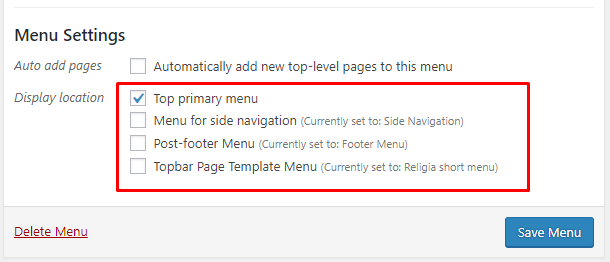
- Top primary menu - For primary menu.
- Menu for side navigation - For the toggle menu. Displayed only on desktop mode.
- Post footer Menu - For the post footer menu aligned with the copyright.
- Topbar Page Template Menu - For pages with Topbar Page Template
Step 6 - After any changes, click on Save Menu button.
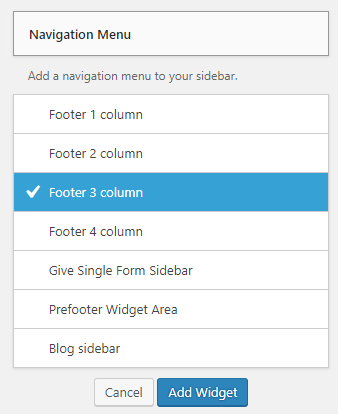
Menus can also be shown on widgets section of Dashboard.
After creating the menu you want to use, go to Appearance > Widgets and set the menu on your site using Navigation Menu widget like in the example below:
|
Choose the sidebar you want the menu to be added, then click on the Add Widget button.

|
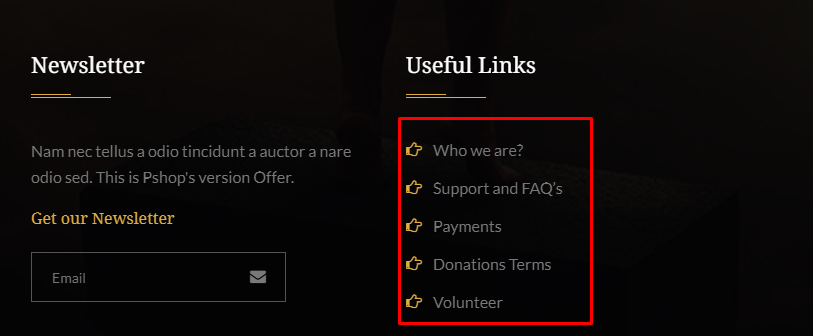
Set the menu to the one you want to add, then click the Save button.
You can see the changes on the page where the sidebar is used.
|


